First Campaign via MAX Bot
A MAX bot is an automated account in the MAX messenger that interacts with users via chat according to predefined logic.
To send Mailings via MAX Bot, users must be subscribed to the MAX Bot resource in the Altcraft platform.
The subscription process works as follows:
- The user launches the bot.
- The bot receives the user's
user_id. - This identifier is sent to the Altcraft platform via API.
- The profile is subscribed to the MAX Bot resource.
After that, the user can receive Mailings. Below is an example of how to configure such a Mailing via a MAX bot in Altcraft.
Step 1. Create an organization and complete verification
Creating bots and channels in MAX is available only for verified corporate accounts and individual entrepreneurs. To confirm your status, create an organization in MAX and complete verification. More details about creating and verifying an organization are available in the MAX documentation.
Step 2. Create a bot
On the MAX for Partners platform, go to your profile and open the Chatbots section:
Click Create and fill in the required fields:
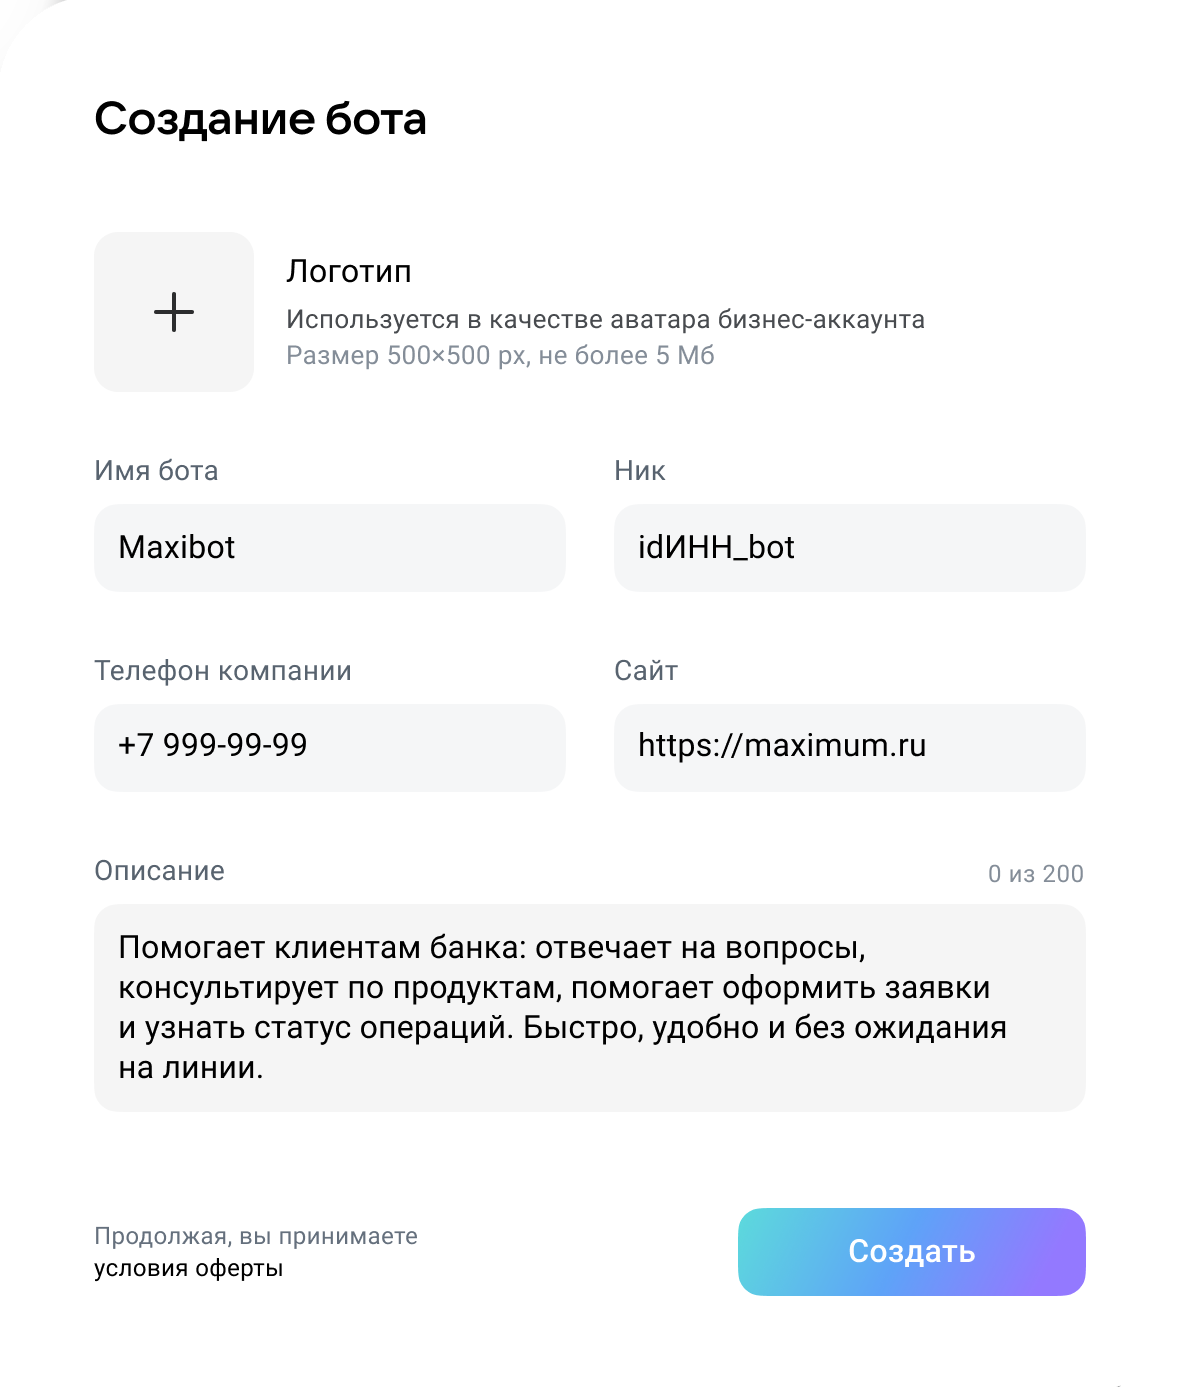
Click Create. The chatbot will be sent for moderation.
More information about creating a bot is available in the MAX documentation.
Step 3. Subscribe clients to MAX Bot in the platform
Go to Data — Profile database and select a database where the data of users subscribed to the MAX bot will be stored.
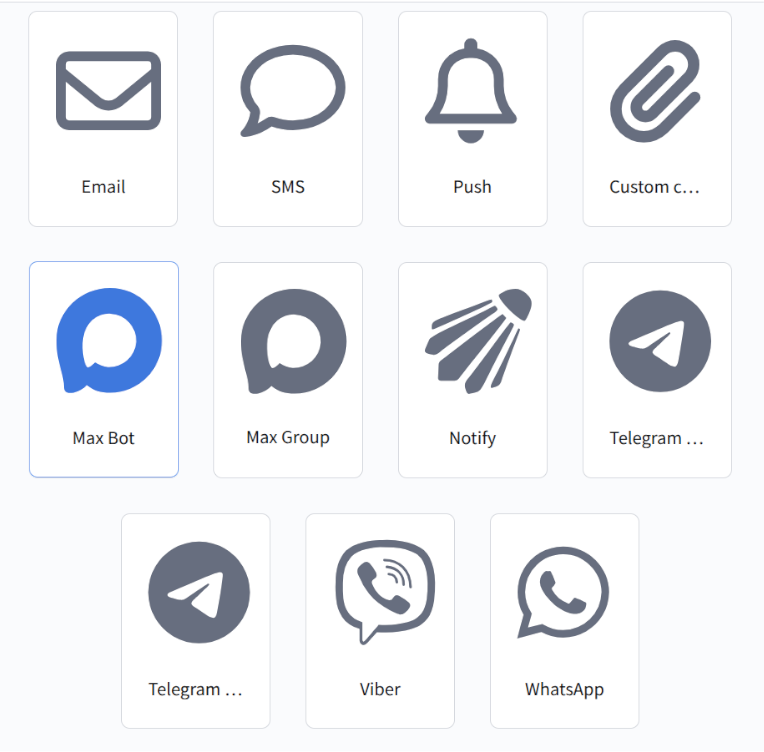
Then open Resources and create a new resource or select an existing one. Use MAX Bot as the channel:
In the main settings, add the required databases. Specify the default tracking domain that will process subscriber clicks on links in MAX bot messages:
![]()
Save the resource. Next, import user data into the database and subscribe them to the corresponding resource. The subscription must include the user's user_id.
Note: the platform only performs message sending. Collecting and transferring user data to the platform, including sending the user_id of users who subscribed to the MAX bot, must be implemented on the client side. More details are available in the MAX documentation.
Example of retrieving a client user_id using the GET method updates
Method: GET
URL:
https://platform-api.max.ru/updates
Response:
{
  "updates": [
    {
      "update_id": "9f3c2a71-8c4b-4c92-9e57-1d7f2c0b8a11",
      "message": {
        "message_id": "msg_847362915",
        "chat": {
          "chat_id": "7349281745621",
          "type": "private"
        },
        "from": {
          "user_id": "48291057",
          "first_name": "Ivan"
        },
        "date": 1719832145,
        "text": "/start"
      }
    },
    {
      "update_id": "b1a0c5e2-3c91-4a6e-8fbb-5e92c0a47d19",
      "callback": {
        "callback_id": "cb_12984756123",
        "data": "order_create"
      }
    }
  ],
  "marker": "1719832145:7349281745621:msg_847362915"
}
<user_id> is the identifier of a specific user that must be sent to the platform.
Step 4. Create a template
Go to the Templates section. When creating a new template, select the MAX Bot channel or add this channel to an existing template.
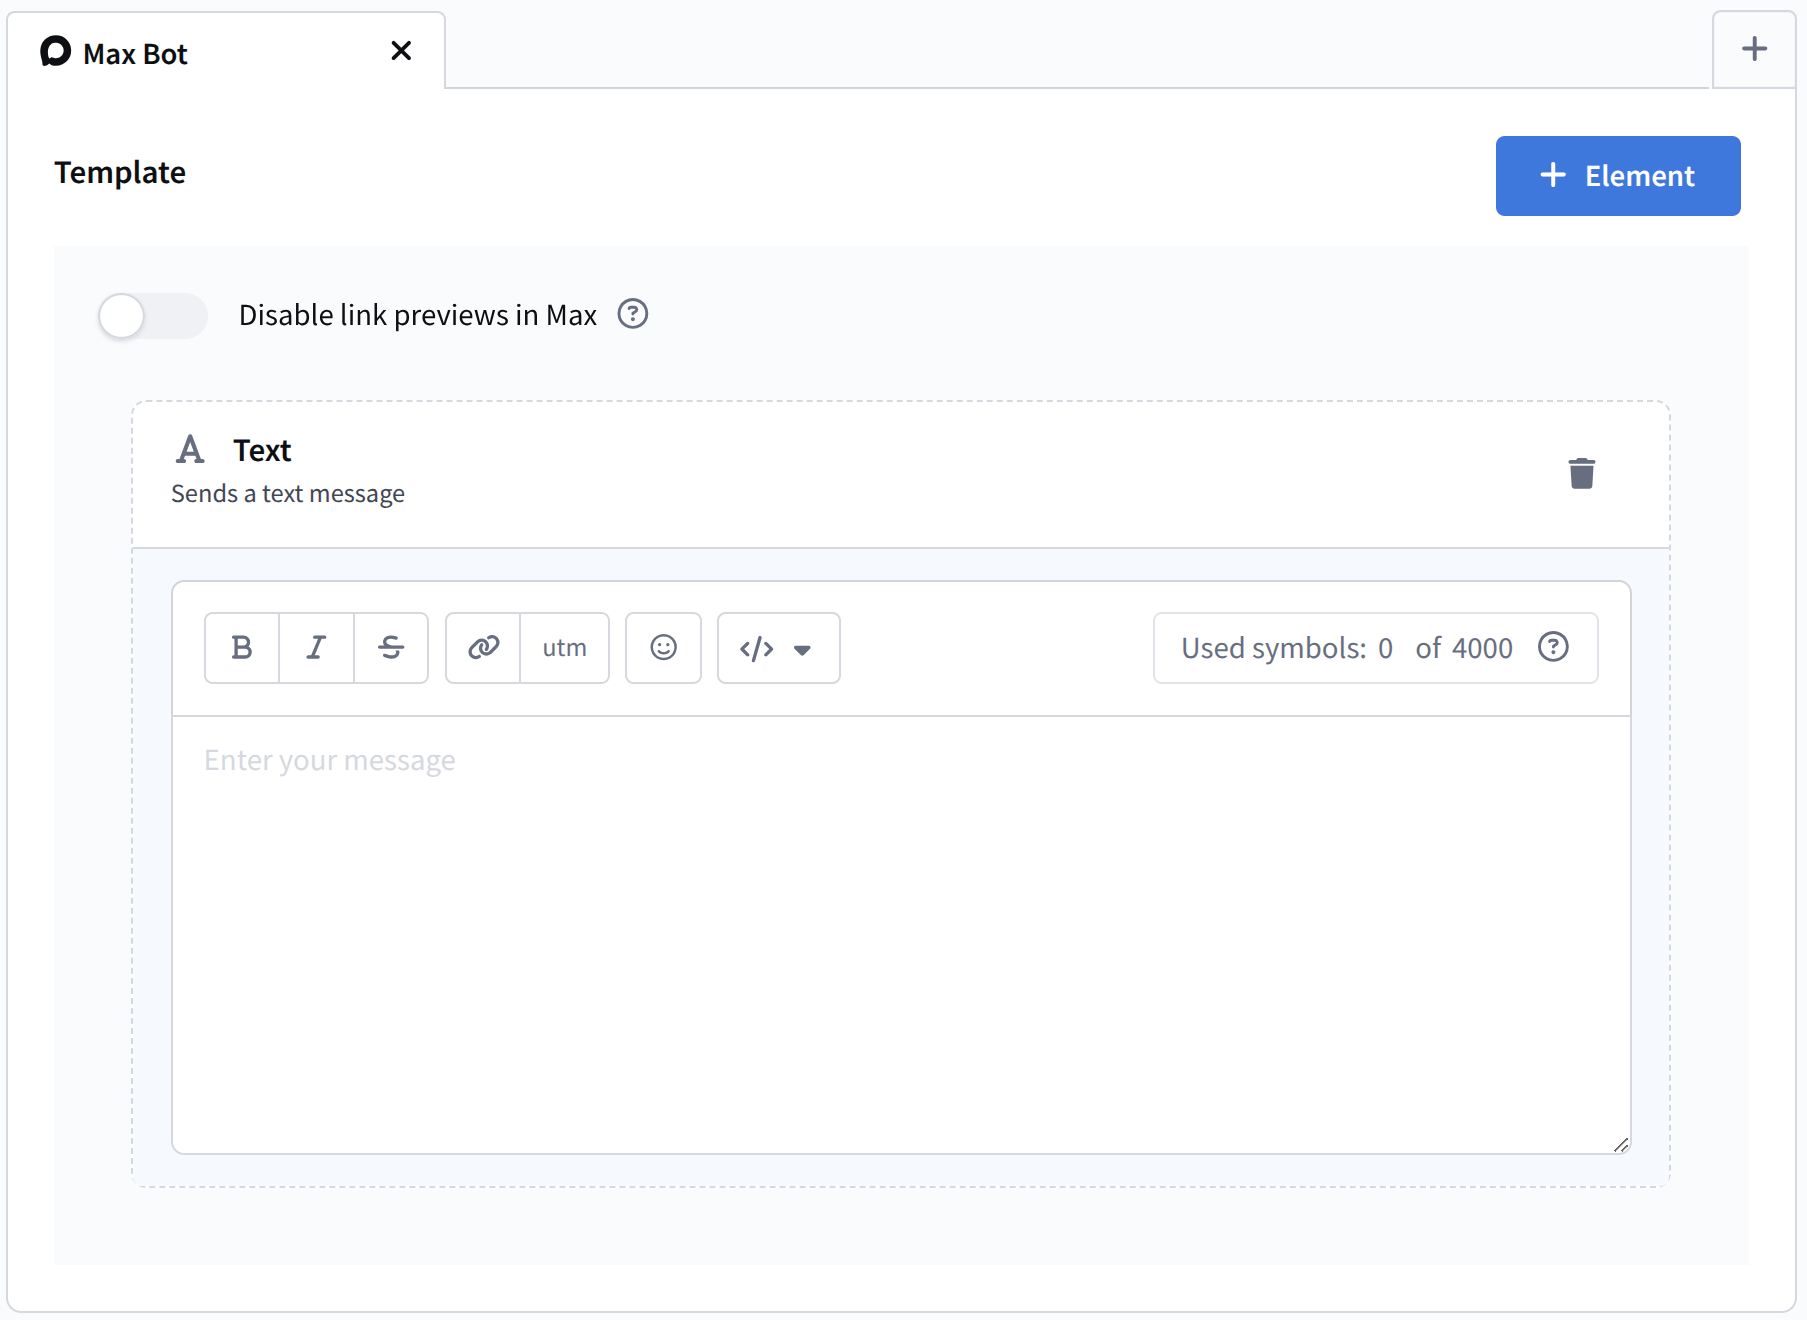
You can include specific client data as well as dynamic text content from external sources.
More details about creating a template for MAX are available in this article.
Step 5. Configure and launch the Mailing
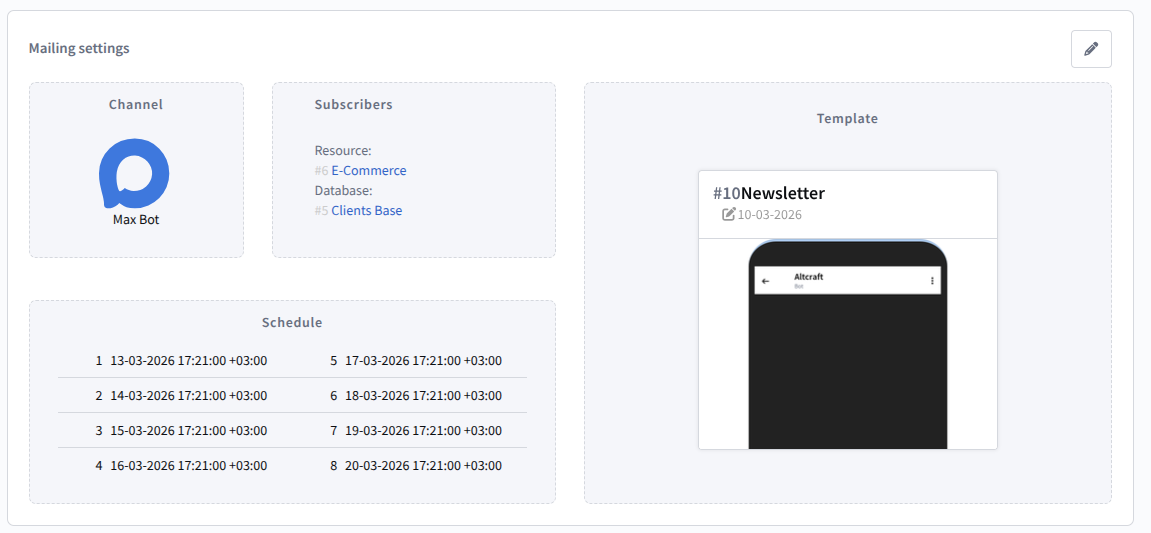
Open the Mailings section and choose the appropriate type of Mailing: broadcast, regular, or triggered.
Create a new Mailing. After filling in the main settings, you need to:
- Select MAX Bot as the communication channel
- Select the previously configured subscription resource and the recipient audience
- Add a message template to the Mailing
- Set the schedule

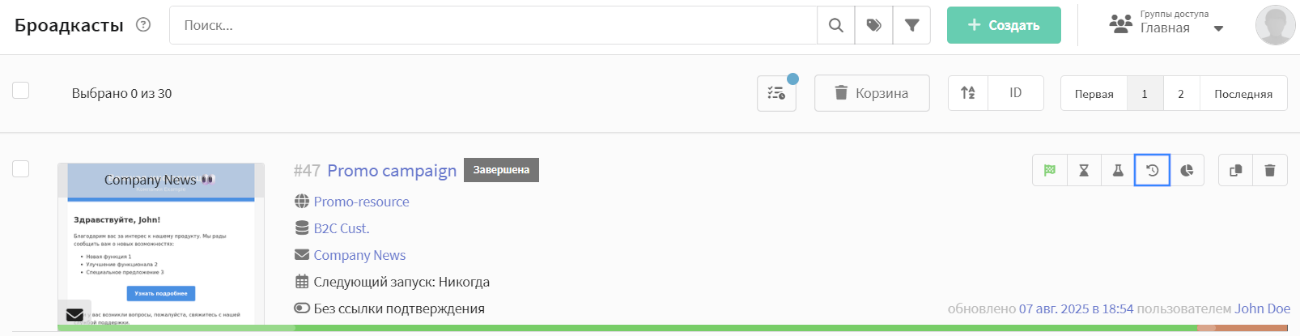
After completing the Mailing configuration, save it. It will appear in the list of Mailings of the corresponding type. On the right side of each record there is a quick actions menu. From there you can perform a test send  and, if everything is successful, activate the Mailing
  :
:
Step 6. Evaluate mailing performance
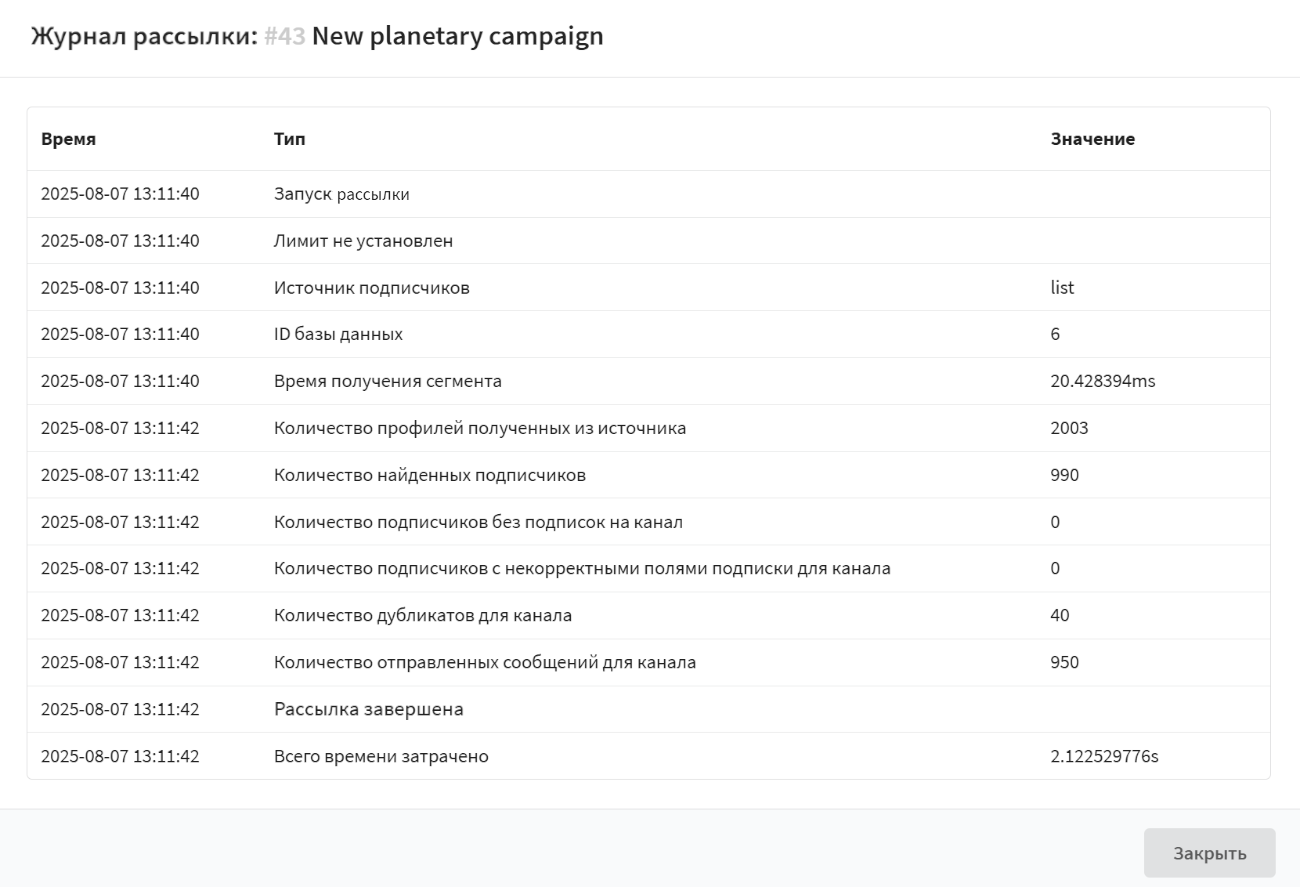
Mailing journal
The Mailing journal is a tool that provides a brief overview of Mailing execution. It records key events, Mailing parameters, and statistics, which helps identify potential issues.
To open the Mailing journal, click the Journal button in the quick actions menu:
The Mailing journal contains the following information:
| Type | Description |
|---|---|
| Mailing start | Time when the Mailing execution started |
| Limit | Indicates whether a message sending limit is set |
| Subscriber source | list — Database segment — Segment (if applicable) |
| Database ID / Segment ID | Identifier of the database or segment used |
| Data retrieval time | Time spent loading contacts from the source (ms) |
| Number of profiles in source | Total number of contacts in the specified source |
| Number of valid subscribers | Number of users with an active subscription |
| Subscribers without subscriptions | Users without a subscription to the target channel (0 in the example) |
| Records with incorrect fields | Errors in subscription data (0 in the example) |
| Number of duplicates | Duplicate contacts (40 in the example) |
| Number of messages sent | Actual number of successful sends |
| Campaign completed | Time when the Campaign finished |
| Total time spent | Total Campaign duration |
Reports and analytics
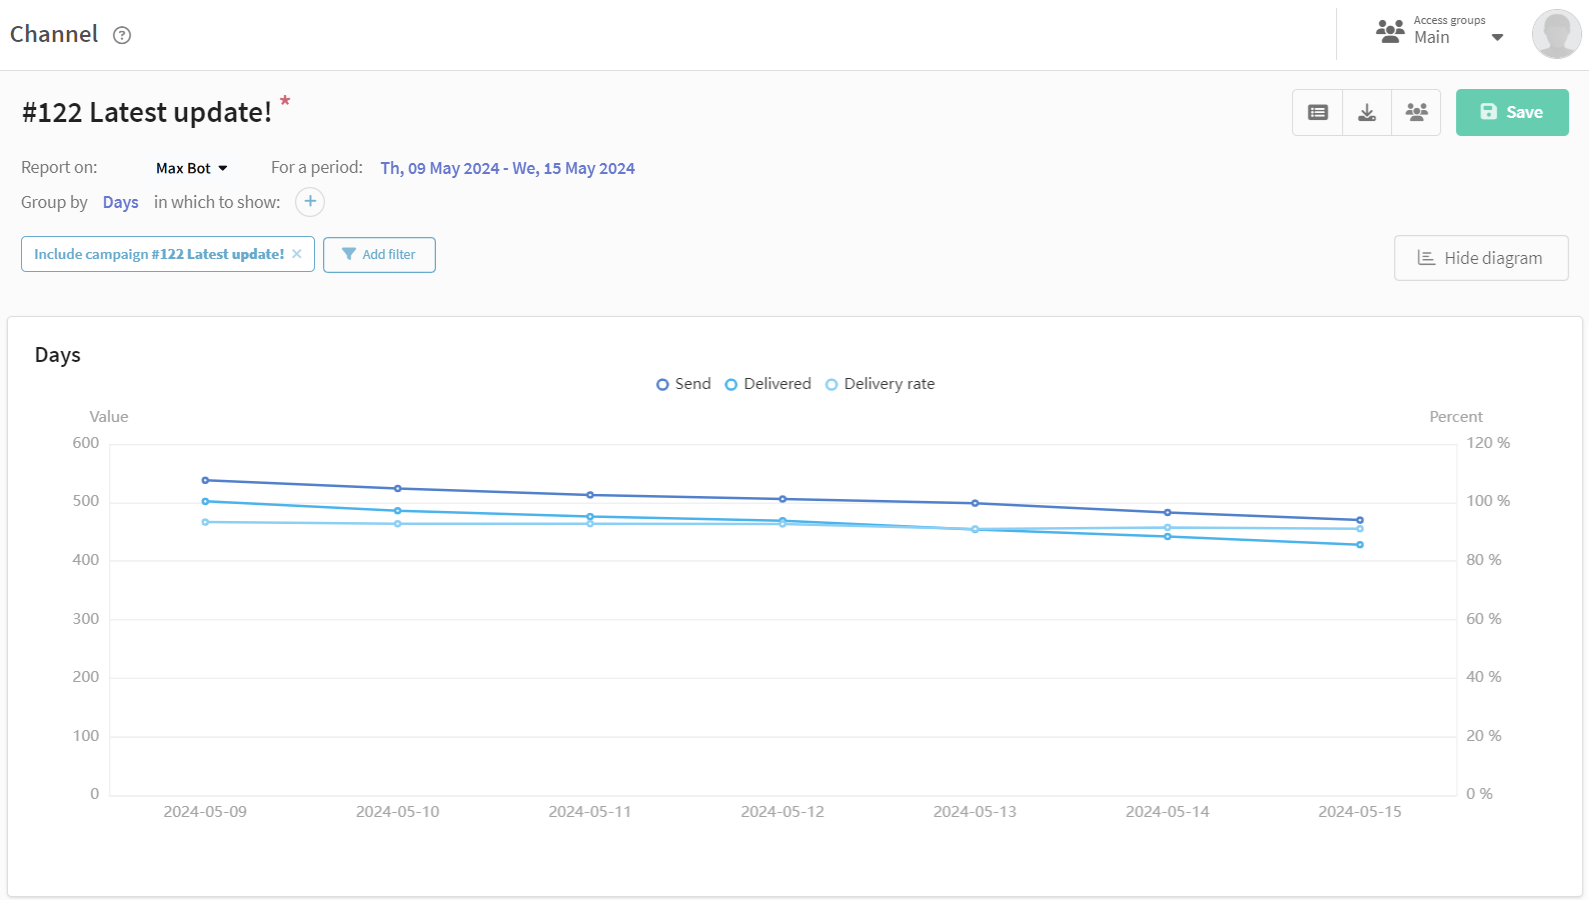
To evaluate the results of the current Mailing, you can view the channel report. The Channel report provides analytics for one or several Mailings.
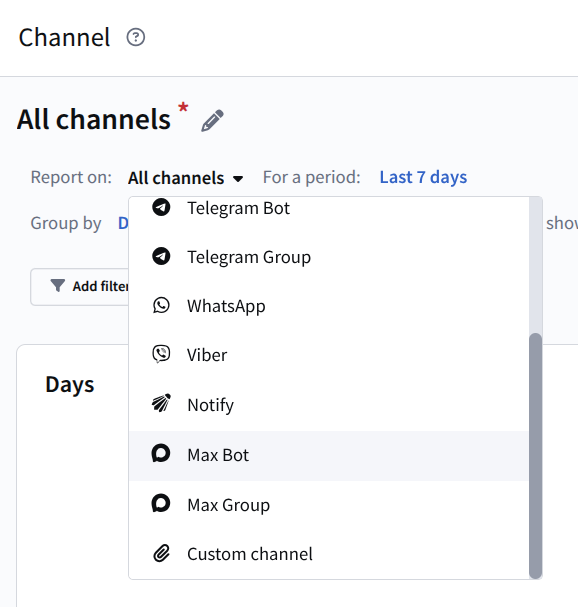
To access statistics, open the Analytics section in the main platform menu. By default, the report for All channels for the last 7 days is displayed.
To group data by channel, select Report by: MAX Bot
Next, add a filter for specific Mailings. Select the required Mailing from the list. As a result, you will receive statistics for the selected Mailing.